Showing posts with label Dungeon Tiles. Show all posts
Tuesday, February 19, 2019
Sepulchre of the Bronze Legion: Room 6
Room 6:
Laid to rest here is the majority of the Legion's swordsman and officers. The sarcophagus contains the remains of the commander, waiting for the time when the Legion is called to fight again.
The commander is wearing bronze breast plate, grieves and bracers in perfect condition. He is wielding a bronze long sword and bears a bronze shield.
Upon the sarcophagus is the Legion Seal, a symbol of a bronze shield crossed by sword and spear. If this is taken from the lid skeletons from every room will begin to rise to pursue and slay the thieves.
In the Southwest corner is a door with a clockwork mechanism. It can be opened once the procedure is determined (easy task).
In the Southeast corner is a secret door leading south.
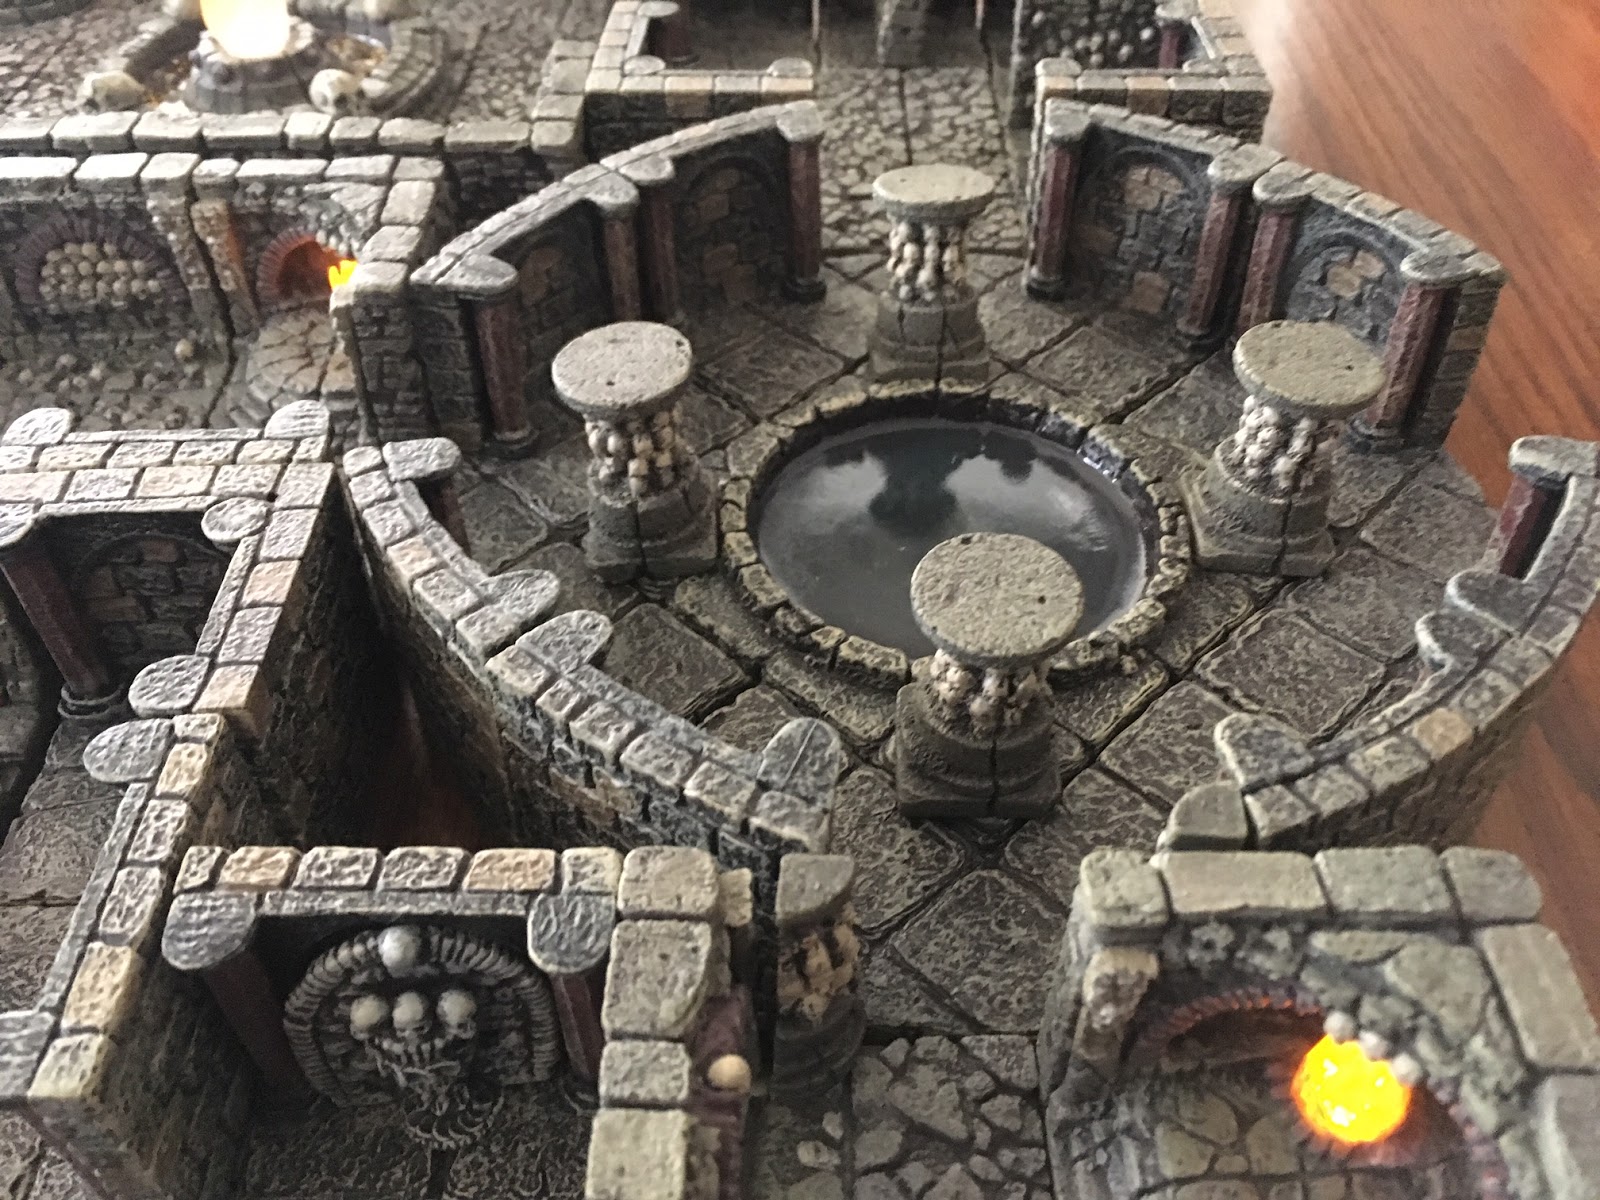
Full Map:
Sunday, February 17, 2019
Sepulchre of the Bronze Legion: Rooms 4 & 5
Rooms 4 & 5:
Interred here are the Legion's spear men. Found in two niches are bronze bladed spears (2).
Full Map:
Friday, February 15, 2019
Sepulchre of the Bronze Legion: Room 3
This small chamber holds the remains of the Legion's archers. In one nook can be found a short bow made of horn.
Full Map:
Wednesday, February 13, 2019
Sepulchre of the Bronze Legion: Room 2
Room 2:
In the secluded corner of this room is a burial niche containing a bronze shield in perfect condition. Beneath the shield of a trap that will launch a poisonous powder at anyone disturbing the shield. The trap will affect anyone in the secluded corner.
Full Map:
Monday, February 11, 2019
Sepulchre of the Bronze Legion: Room 1
Renowned for their skill and resolve in battle, the Bronze Legion built their own secret burial chambers. Here their dead are together in death as they were in life, ready to fight enemies that threaten them.
This is the third mini dungeon of an ongoing series that will be posted, built using Dwarven Forge terrain. The full map is at the bottom of the post.
Room 1: Pool of the Dead
This room is cold, barely above freezing. In the center of the room is a pool fed from an icy spring. It is fresh and clean. Marching in a line around the perimeter of the circular room are three skeletons armed with spears. They will ignore visitors unless they are attacked or thieves have stolen the Legion Seal from room 6.
Full Map:
Wednesday, January 30, 2019
The Halls of Mugg the Mad: Room 6
Room 6: The Portrait Vault
Within this locked chamber, hung on the surrounding walls are 11 portraits in fancy gilded frames. The treasure illustrates just how mad Mugg truly is or was. Total value = 1,000 gold pieces for the frames, and it is unlikely anyone would see the actual portraits as having value.
The portraits include a large eyed kitten, dogs playing poker, two farmers with the heads of weasels, a knight mounted on a flail snail, and various other bizarre images.
Monday, January 28, 2019
The Halls of Mugg the Mad: Room 5 and secret hallway
This image shows Room 2 leading into both Room 5 and the secret hallway, and in the backgroud you can see part of Room 6.
Secret Hallway - Halfway along the hall is a covered 10' pit trap, standard detection chances. The other secret door is behind the throne.
Room 5: Mugg's throne room.
This grand chamber has a high vaulted ceiling supported by 4 huge marble pillars. Occupying the room are the following:
Mugg the Mad, Ogre, 5HD, maximum hit points. He wears a 500 gold piece valued necklace, has a pocket full of flawed pearls (total 75 gp value) that he uses like marbles to foil the footing of enemies, and he wears BRACERS OF BASHING (to be detailed in an upcoming post).
There are 3 bugbear guards, 3+1 HD each, hitpoints 15 each. One wears chainmail +1, another has a scroll of healing he will use on Mugg if needed, and the third has 11 silver pieces.
Also present are 7 goblins, one of which will use a WAND OF FROST BARRIER with 6 charges (to be detailed in an upcoming post). The goblins have a combined 15 copper pieces.
There is a metal door leading to Room 6.
Saturday, January 26, 2019
The Halls of Mugg the Mad: Rooms 3&4
Here are rooms 3 and 4 of The Halls of Mugg the Mad.
Room 3: Prison
There is a single goblin guard here along with a human prisoner kept in the oubliette. The goblin has 2 copper pieces.
Room 4: Worg Lair
The 2 Worgs have made a lair of the oubliette which has been broken open. There are also 3 goblins present. Treasure totals 33 copper pieces and 2 silver pieces. The room is also littered with bone fragments.
Thursday, January 24, 2019
The Halls of Mugg the Mad: Room 2
This is the small ante-chamber that leads from Room 1 to Room 5.
Room 2: Ante-chamber
The room is cluttered with stacks of crates and barrels filled with rotting food, stale water, and moth eaten clothing.
Hidden behind a barrel sits a goblin guard that if undetected will wait until the party enters Room 5 and then will attack from behind.
In the pocket of a vest can be found a silver bracelet worth 25 silver pieces.
There is a secret door in the right hand corner to the right of the door that leads into Room 5, to a hidden hallway.
Tuesday, January 22, 2019
The Halls of Mugg the Mad: Room 1
This is the dungeon based on the image I drew for one of the mugs available in my zazzle store (link in upper right of web page, not shown on mobile version of blog).
Original map
Room 1
Room 1: Entrance Hall
This large room 50' x 40' smells strongly of urine and feces. It contains a large statue of a hammer wielding dwarf that has been defaced and used as a guarderobe by the inhabitants. The floor is littered with bones among which can be found a silver ring worth 12 copper pieces.
The door to Room 2 is locked.
The door to the hallway is not locked.
Monday, January 14, 2019
Dungeon of Jolokia: Room 8
Room 8: Great Ceremonial Chamber
At the back of the room are the two personal chambers of the nagas, Bhut and Mogura (Mogura is in room 4). Bhut is present and will join the action in room 6 1 round after any combat begins. Bhut is an albino naga and is the leader of the cult.
Present in the ceremonial chamber are the following:
- 2 giant constrictor snakes.
- 1 Fang of Judgement (fighter level 2) Scale Mail +1, Shield +1, Scimitar +2.
- 1 Speaker of Fire (wizard level 2) Burning Hands spell
- 1 Tongue of Jolokia (Cleric, level 2)
- 6 zero level cultists with powder, dagger, and finger cymbals.
Treasure stored in Bhut and Moruga's personal chambers:
A golden naga statue with engraved fire designs and fire opals for eyes - 1,500 gold pieces.
Three silver statuettes of serpent people - 100 gold pieces each.
200 gold pieces, 1,130 silver pieces, 4,000 copper pieces, in sacks and chests.
A potion of levitation.
Eyes of Petrification
Saturday, January 12, 2019
Dungeon of Jolokia: Rooms 6&7
Room 6 is accessed by the northwestern hallway and room 7 is accessed from room 3 via the east door.
Room 6:
There is a giant venomous snake in the central pit and a team of attendant cultists in this room.
- 3 zero level cultists each with powder, dagger, and finger cymbals.
- 1 Fang of Judgement (fighter, level 2) scimitar, chainmail +1.
- 1 Speaker of Fire (wizard, level 2) Burning Hands spell.
- 1 Tongue of Jolokia (cleric, level 2) Mace +2.
Room 7: Storage for food, water, raw peppers, etc.
Wednesday, January 2, 2019
Dungeon of Jolokia - Rooms 1 and 2
Here are rooms 1 and 2 of the snake dungeon converted into Dwarven Forge terrain. Below the pictures is the original map.
Room 2: The walls of this room are covered in mosaic tiles depicting many beings contorted in pain, their mouths open with what appears to be flames around their tongues. The floor is covered in a swirling serpent-like pattern with worn pathways from the tread of many feet.
Tapestries hide doors on the west and east walls. The tapestries show a great open mouth, a human headed serpent wrapped around the tongue with flames stretching the length of the beast.
The door to the east is locked.
Any noise of normal talking volume or above will draw the attention of the naga in room 4 who will come listen at the west door to determine a course of action. If it believes the party have passed out of room two through the east door it will pause for certainty and then quietly follow them planning an ambush later.
Monday, December 17, 2018
Lair of the Necromancer
Here are a few pictures from the lair of a necromancer the party only saw part of before retreating to safety. They were in bad shape with most of them at 1 or 2 hit points so a withdraw was the wisest option.
The lair contained the remaining cultists of the Rat God, the Necromancer, and numerous skeletons and zombies, including a number of ripening bodies in the fetid water in the lowest reaches of the dungeon. Had more than just one party member entered the place, the Necromancer would have animated the bodies in the water to bolster his already impressive force of undead.
During the confusion the necromancer would have made his escape, leaving behind 8 cultists, 4 skeletons, and 10 zombies to vex the adventurers. Treasures left behind included an apprentice spell book, several Lesser Wondrous Figurines, a talking Auguring Skull, and a journal.
Saturday, December 15, 2018
More pics from other adventure moments.
Above - A Hammered Game Table completely filled with Dwarven Forge and other scenery.
Above - A wealthy merchants veranda.
Above - The merchant's basement with secret door behind painting.
Above - Delivery for the blacksmith.
Above - Well-to-do citizens hob-nob by the cathedral clock tower.
Above - The party is surprised by an Ocre Jelly while in the sewers.
Above - The party finds a secret door in the sewers and emerges into caverns.
Sunday, December 9, 2018
More Scenery
This time I was playing around with the Erinthor Mountain pieces from Dwarven Forge and a Balrog tea-light piece, using an LED flashlight for more oomph.
Friday, December 7, 2018
Subscribe to:
Posts (Atom)